
Easy Sour Cream Biscuits for Two

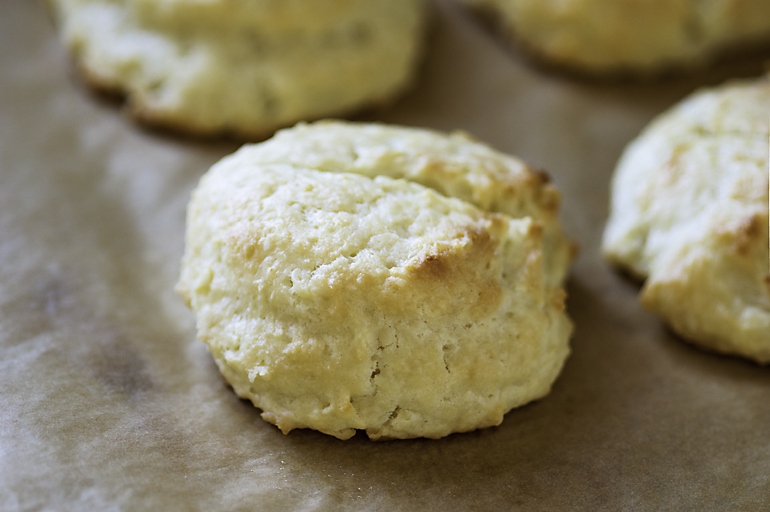
I love biscuits for breakfast but most of the time I don’t feel like going to the trouble of cutting in butter, and rolling out and cutting the dough, especially before coffee! I just want a hassle free breakfast. These biscuits are light, tender and buttery with a nice tang from the sour cream and a golden-brown exterior. I like that they make such a small batch and that’s another reason I want a simple recipe. It just doesn’t seem worth it to go to a lot of trouble for 4 biscuits. I need a recipe that’s quick and easy and this one is just that! Just stir, scoop, and bake!
Go ahead and adjust your oven rack to the middle position and preheat the oven to 425 degrees. Line a baking sheet with parchment paper.
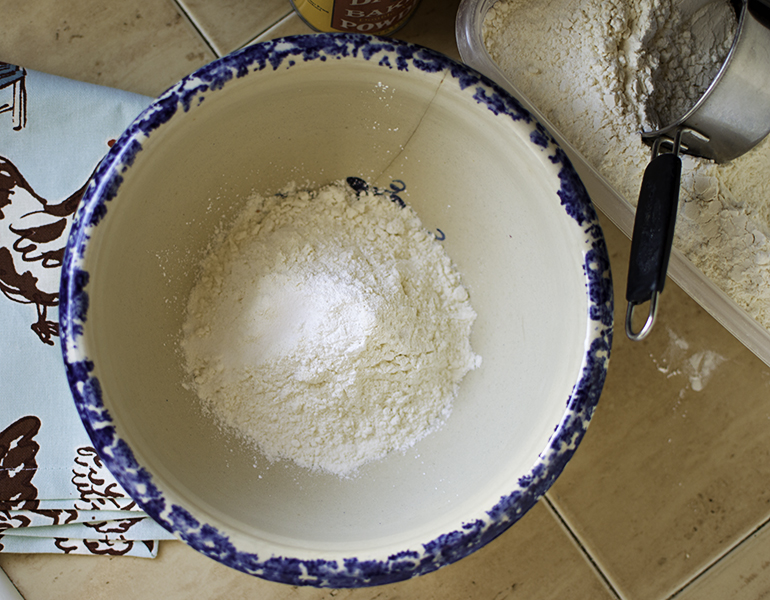
Whisk all dry ingredients together in a medium bowl.
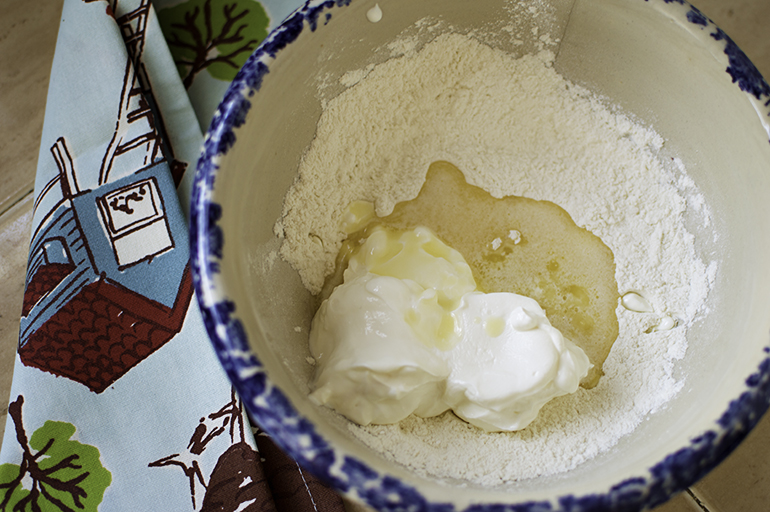
Add the sour cream and 2 tablespoons of the melted butter into the dry ingredients.
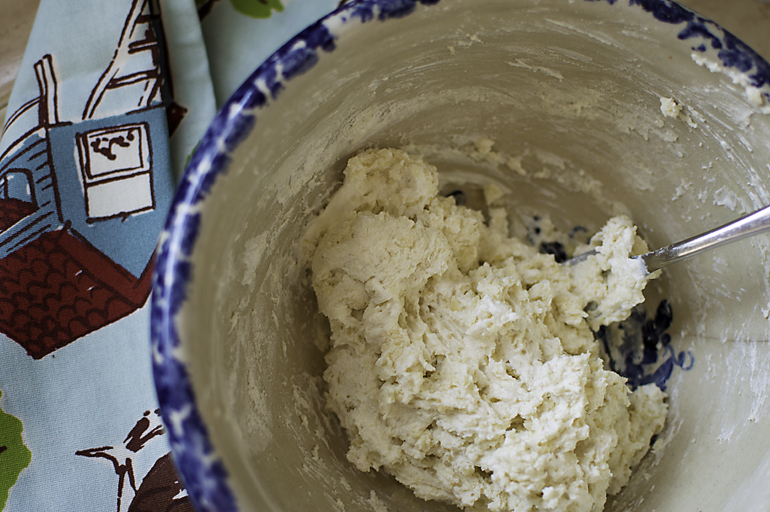
Stir everything until just combined.
Using a quarter cup spring-loaded ice cream scoop, or a greased 1/4 cup measuring cup, scoop out and drop the dough onto the parchment paper lined baking sheet spacing them out about 2 inches apart. Brush them with the remaining 1 1/2 teaspoons melted butter and bake until golden brown, 20-25 minutes. Rotate the baking sheet halfway through baking. Let the biscuits cool for 10 minutes.

I ate mine with butter and mango-peach preserves!

- 3/4 cup (3 3/4 ounces) all-purpose flour
- 3/4 teaspoon baking powder
- 1/4 teaspoon salt
- 3/4 cup sour cream
- 2 tablespoons unsalted butter, melted and cooled plus 1 1/2 teaspoons for brushing on top of the biscuits before baking.
- Adjust oven rack to middle position and preheat the oven to 425 degrees.
- Line a baking sheet with parchment paper.
- Combine flour, baking powder, and salt in a medium bowl. Add the sour cream and 2 tablespoons of the melted butter and stir until just combined.
- Using a greased 1/4 cup measuring cup or a #16 ice cream scoop, scoop out and drop dough onto prepared baking sheet spacing them about 2 inches apart. Brush with remaining 1 1/2 teaspoons of melted butter.
- Bake until golden brown, 20-25 minutes, rotating baking sheet halfway through baking. Cool biscuits for 10 minutes and serve warm.
- Use a spring loaded #16 ice cream scoop for easy portioning or if you don't have one a greased 1/4 cup dry measuring cup works too.
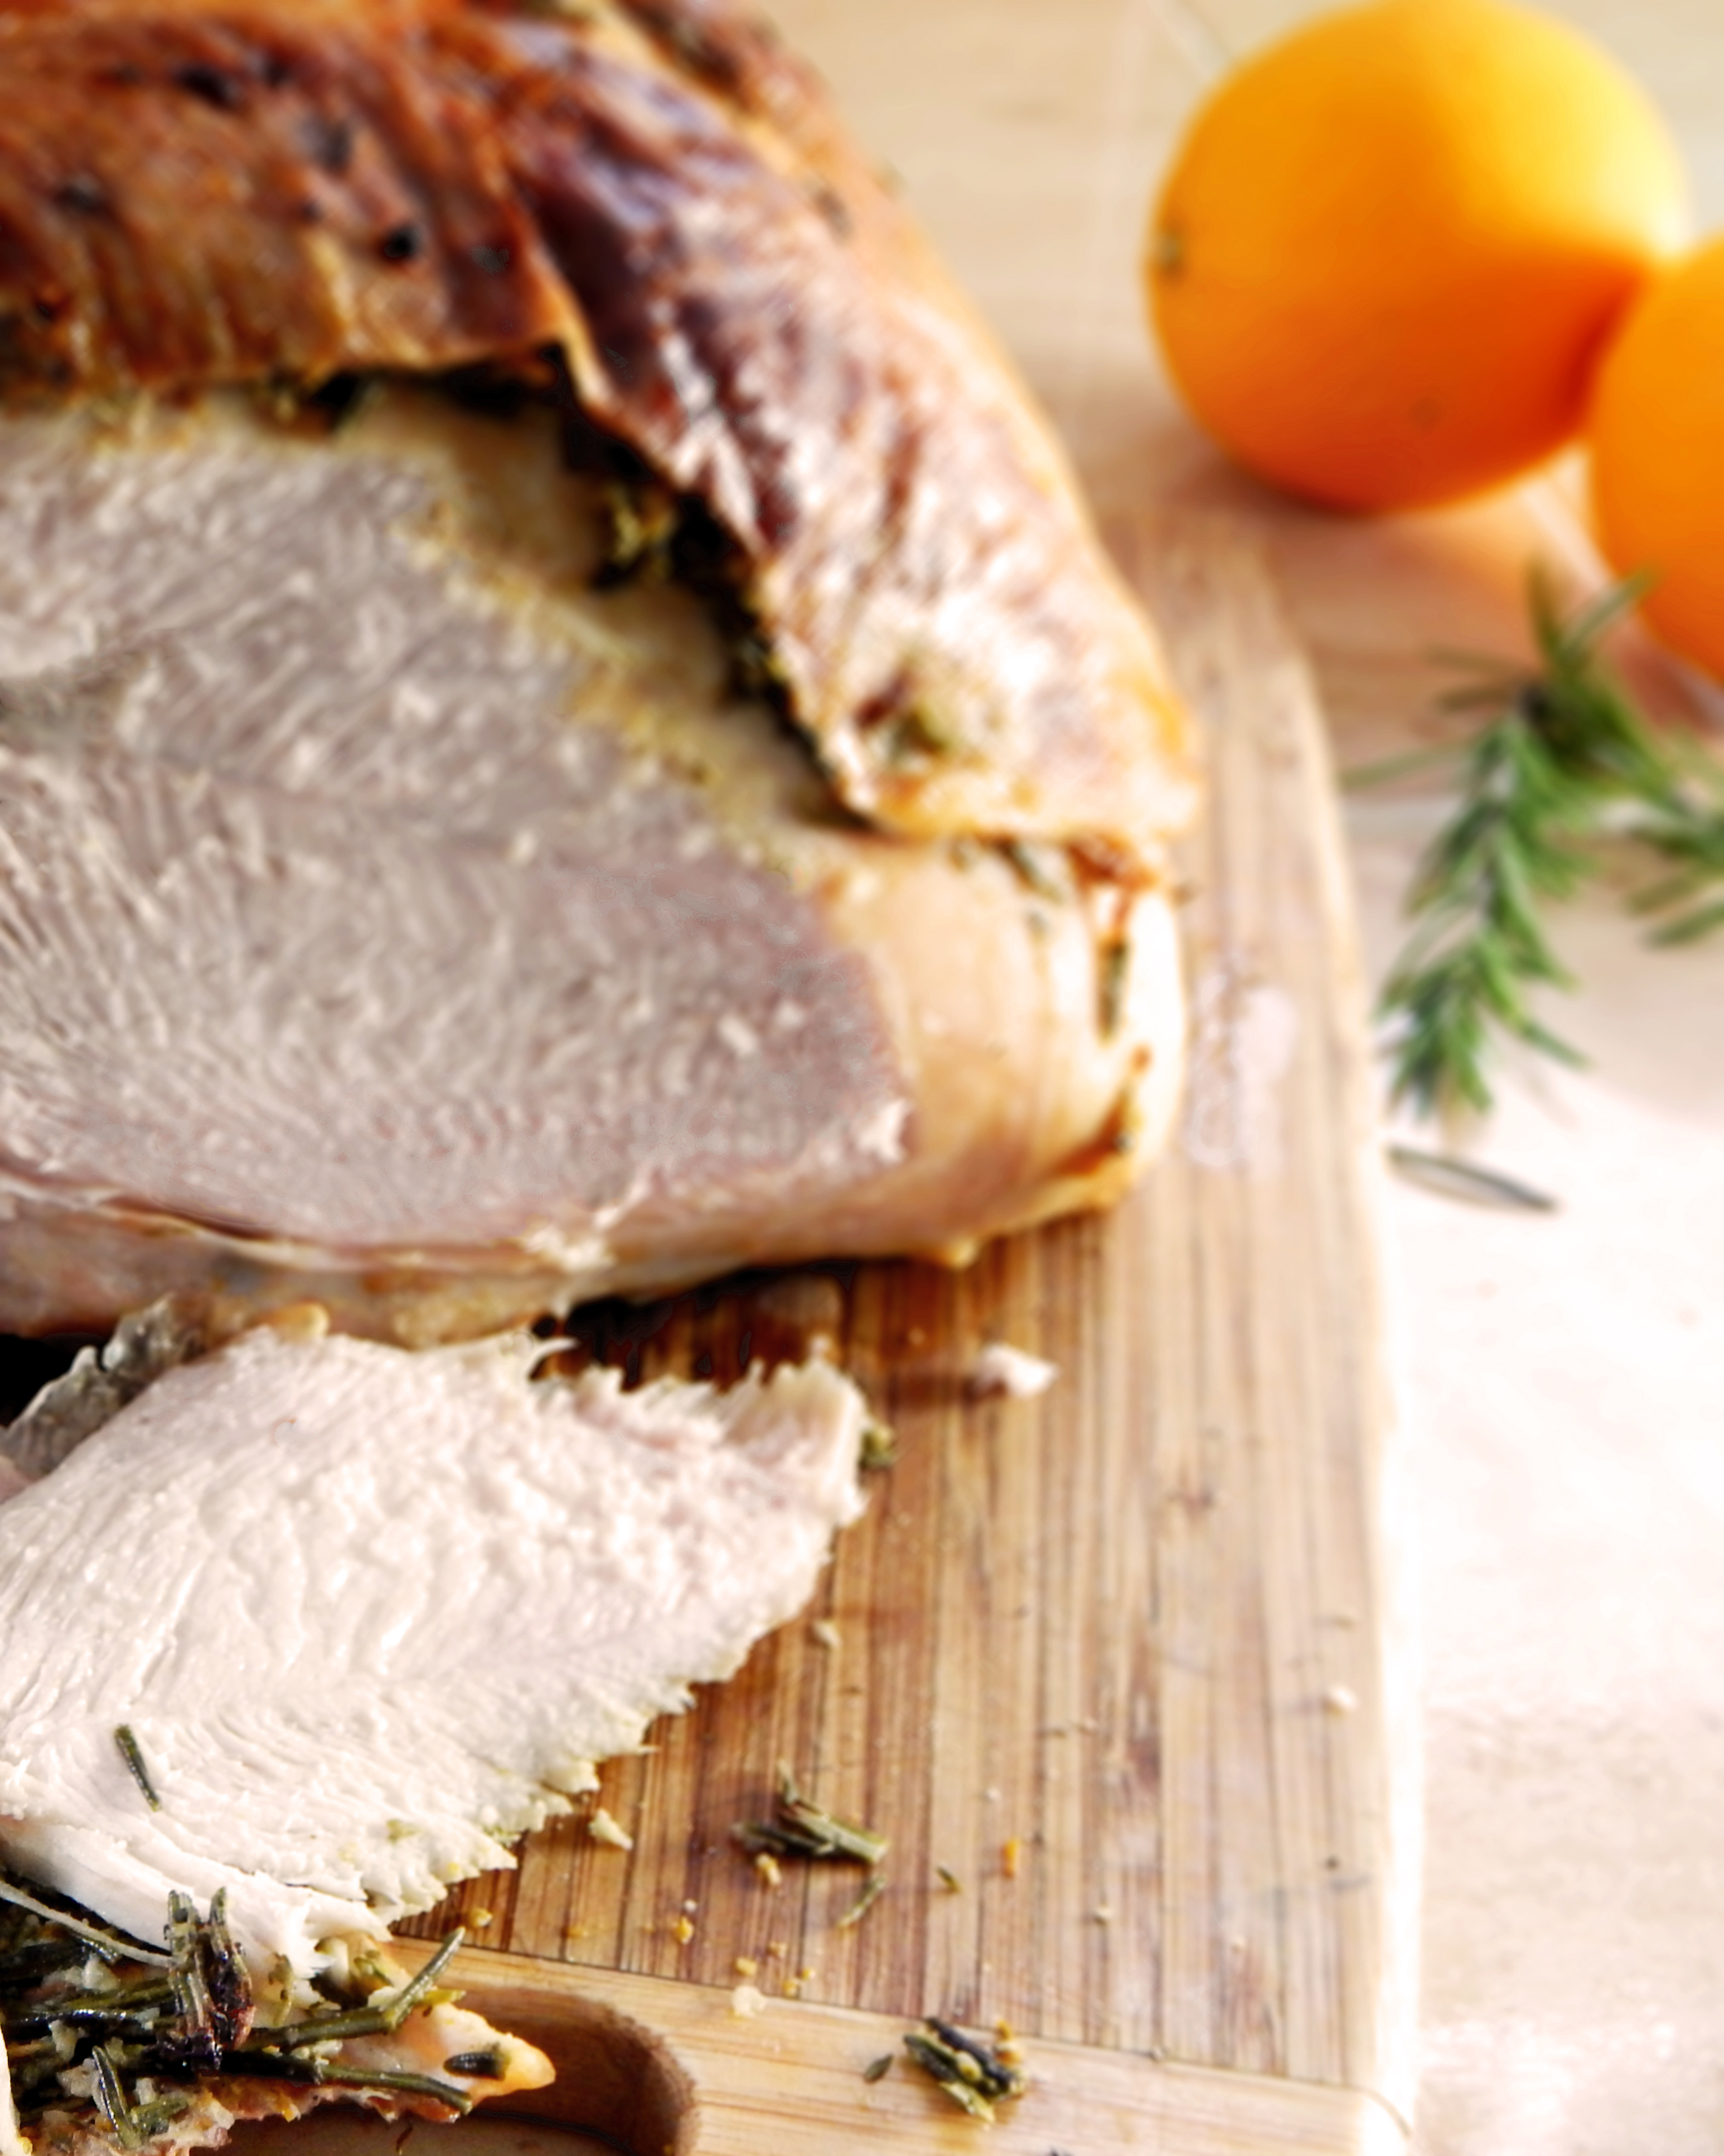
Orange and Rosemary Roasted Turkey Breast

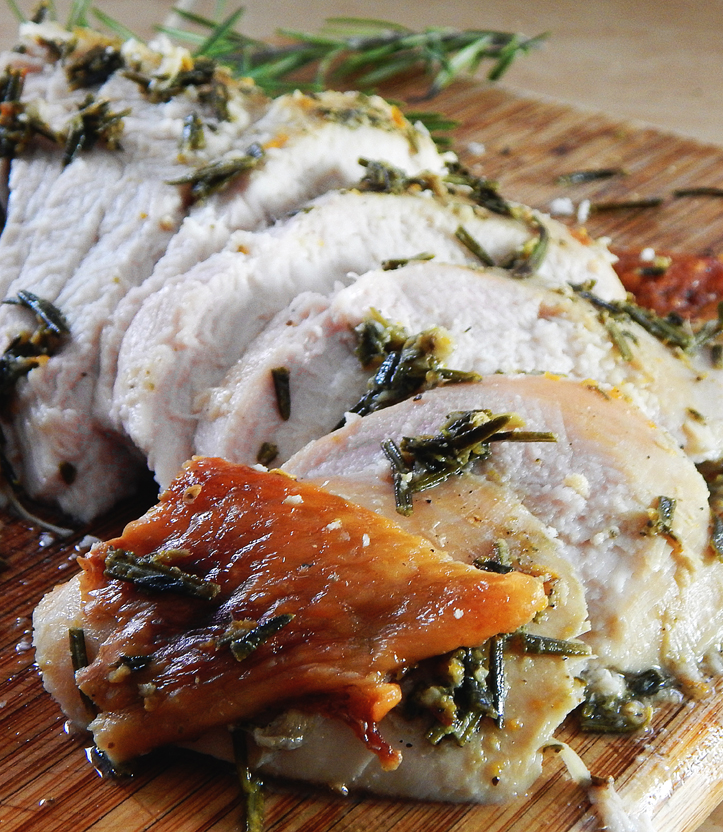
This roasted turkey breast is super easy and tastes amazing with the orange and rosemary mixture roasted under the skin. Starting the turkey off at a higher temperature ensures that the skin is crisp and then lowering the temperature to keep the meat moist results in the perfect main course for your Thanksgiving.
Sometimes you just don’t want or need a whole turkey so roasting a turkey breast is the perfect option. A turkey breast is perfect for a small gathering or just for the two of you. You’ll have left-overs but who doesn’t want that? I know I love the left-overs! It seems I enjoy it more the next day anyway. Maybe because all of the frenzy of cooking a big meal is over and you can just relax!
The first thing you’ll do is mix together the butter, garlic, rosemary, orange zest, red pepper flakes, salt, and pepper in a bowl.

Next you’ll carefully separate the skin from the turkey meat by sliding your hand in between the skin and breast and working your way up to the breast bone. It seems weird at first if you’ve never done it but hang in there…it’s easy! Once you’ve done that you will work half of the softened butter-herb mixture under one half of the turkey breast, repeating the process on the other side of the turkey breast.
Using your hands again, gently rub the turkey skin to evenly distribute butter over the entire breast. Basically you’re smoothing out all that butter and herb mixture so it’s evenly distributed under the skin.
Place the turkey in a V-rack sprayed with cooking spray and set it inside a large roasting pan. Pour one cup of water into the roasting pan.

Roast the turkey for 30 minutes. Reduce the oven temperature to 325 degrees. Continue roasting turkey until the thickest part of breast registers 160 degrees on instant-read thermometer, about 1 hour longer. Transfer turkey to carving board and let rest for 20 minutes before carving.

- 4 tablespoons unsalted butter, softened
- 3 medium garlic cloves, minced or pressed through garlic press (about 1 tablespoon)
- 1 tablespoon minced fresh rosemary
- 1 teaspoon grated orange zest
- ¼ teaspoon red pepper flakes
- ¾ teaspoon table salt
- ¼ teaspoon ground black pepper
- 1 whole turkey breast (6 to 7 pounds), bone-in and skin-on, trimmed of excess fat and patted dry with paper towels
- 1 cup water
- Adjust oven rack to middle position and heat oven to 425 degrees. Mix butter, garlic, rosemary, orange zest, red pepper flakes, salt, and pepper in medium bowl until thoroughly combined. Carefully separate turkey skin from meat over breast; avoid breaking the skin.
- Work the butter mixture under skin on both sides of breast and rub skin of turkey to evenly distribute butter over breast. Spray V-rack with nonstick cooking spray and set inside large roasting pan. Place turkey in rack with skin side facing up; pour water into roasting pan.
- Roast turkey for 30 minutes. Reduce oven temperature to 325 degrees. Continue to roast turkey until the thickest part of the breast registers 160 degrees on instant-read thermometer, about 1 hour longer. Transfer turkey to carving board and let rest for 20 minutes. Carve and serve.
Fresh Succotash

If the only succotash you’ve ever had was corn and lima beans, frozen in a bag and drowned in a heavy cream sauce then you have to try this recipe! It’s so easy and quick to put together using fresh corn off the cob. You absolutely don’t want to substitute the fresh corn in this recipe for frozen or canned. The crisp kernels really make this a stand out dish that everyone will love.

I know, I know…nobody loves to take the corn off of the cob. It can be a messy job! I have a trick that makes removing the corn from the cob super simple and neat. Just place the stem of your corn cob into the hole of a bundt pan and then remove the kernels with a sharp knife. The bundt pan catches the kernels with no mess!

To keep this recipe quick and easy I’m using canned butter beans for a creamy consistency and mild flavor, reserving some of the liquid to make a light sauce. Fresh red peppers add gorgeous color along with onion and garlic sauteed in a little butter because well…corn and butter just go together! Adding a little lemon juice to the reserved butter bean liquid really brightens everything up, don’t skip it. Parsley adds more freshness to the flavors and the little kick of cayenne makes this dish perfect! It tastes like summer on a plate!


- 1 (15-ounce) can butter beans, 2 tablespoons liquid reserved, rinsed
- 2 teaspoons lemon juice
- 3 tablespoons butter
- 1 small onion, chopped fine
- 1/2 red bell pepper, cut into 1/4-inch pieces
- Salt and pepper to taste
- 2 garlic cloves, minced
- Pinch cayenne pepper or more to taste
- 4 ears corn, kernels cut from cobs or approximately 3 cups
- 2 tablespoons chopped fresh parsley
- Stir reserved 2 TBSP of bean liquid and lemon juice together in small bowl and set aside. Melt butter in 12-inch nonstick skillet over medium-high heat. Add onion, bell pepper, and 1/2 teaspoon salt and cook, stirring frequently, until softened and beginning to brown, 5 minutes. Add garlic and cayenne and cook until fragrant, about 30 seconds.
- Reduce the heat to medium and add corn and beans. Cook, stirring occasionally, until corn and beans have cooked through, about 4 minutes only. Add the bean liquid mixture and cook, stirring for 1 minute. Remove skillet from heat, stir in parsley, and season with salt and pepper to taste.
- Do not substitute frozen or canned corn.
Rustic Free-Form Tartlets for Two

I love summer fruit pies but making a whole pie for just two people is just too much not to mention the pie crust takes time. This simple free-form tartlet is a great alternative to pie.

I wanted a flaky crust so I learned a new technique called fraisage, in which the dough is smeared with the heel of your hand, spreading the butter pieces into long, thin streaks between layers of flour and water. This technique is perfect for free-form tarts where leaking might be a concern. Because you are creating alternating layers of butter and dough, you are less likely to get a clump of butter that will melt during baking and form a hole in your crust as it bakes.

Fraisage Technique
The dough is then lifted up and back over the fruit leaving the center exposed, and loosely pleated. The fruit needs only the simple addition of sugar, 3 to 5 tablespoons depending on the type of fruit.

Some of the best mix of fruits are stone fruits and berries (I’m using peaches and blueberries but plum and raspberries or apricots and blackberries would be delicious too), you can use only one type of fruit if you prefer. Peeling the stone fruit, even the peaches, is not necessary.

Taste the fruit before adding sugar to it; use the lesser amount if the fruit is very sweet, more if it is tart. Be sure not to add the sugar to the fruit until you are ready to fill and form the tart, the sugar releases the juice in the fruit and you’ll end up with a soggy crust if done too soon.

Once baked, the tartlets are best eaten warm, or within 3 or 4 hours, although you can reheat them in a 350-degree oven. Don’t forget to add a scoop of vanilla ice cream…heaven!

- 3/4 cups unbleached all-purpose flour (3 3/4 ounces), plus additional for work surface
- 1/4 teaspoon table salt
- 5 tablespoons unsalted butter, cold, cut into 1/2-inch cubes
- 1 - 3 tablespoons ice-cold water
- 2 medium peaches
- 1/2 cup blueberries
- 2 - 4 tablespoons granulated sugar
- 1/2 tablespoon granulated sugar for sprinkling
- In a food processor, pulse the flour and salt to combine, about three 1-second pulses. Scatter the butter pieces over the flour, then pulse until the texture resembles coarse bread crumbs and the butter pieces are about the size of small peas, eight 1-second pulses. Sprinkle 1 tablespoon water over the mixture and process for two pulses; repeat using 1 teaspoon at a time until dough begins to form small curds and holds together when pinched with fingers. Empty dough onto your work surface; dough will be crumbly (if the dough has large dry areas, sprinkle additional 1 teaspoon water over dry areas and incorporate by gently fluffing entire amount of dough with fingers). Using bench scraper, gather dough into rough mound about 6 inches long and 2 inches wide (mound should be perpendicular to edge of counter). Beginning from farthest end, use the heel of your hand to smear about one third of dough against work surface away from you. Repeat until all the dough has been worked. Using the bench scraper, gather dough again and repeat. Dough should now be cohesive. Form dough into 3-inch disk, wrap in plastic, and refrigerate until cold and firm but malleable, about 1 hour.
- During the last 30 minutes of chilling, prepare fruit. Halve and pit stone fruit and cut into 1/2-inch-thick wedges. Gently wash and dry the berries and combine the fruit in medium bowl (you should have about 3 cups); set aside. Adjust oven rack to lower-middle position and heat oven to 400 degrees.
- (If dough has chilled longer than 1 hour and is cold and hard, let stand at room temperature 15 to 20 minutes before proceeding.) Divide dough into 2 equal portions. On a large sheet of parchment paper lightly dusted with flour, roll each dough portion into 7 inch round about 3/16 inch thick, dusting with flour as needed. If the dough sticks to parchment, gently loosen and lift sticky area with bench scraper and dust parchment with additional flour. Stack rounds and refrigerate until cool and firm but still pliable, 15 to 30 minutes If refrigerated longer and dough is hard and brittle, let stand at room temperature until pliant.
- Sprinkle fruit with sugar and toss gently to combine. Remove the dough rounds from refrigerator. Mound one half of fruit in center of each dough round, leaving 1 1/2-inch border around edge. Carefully grasp one edge of dough and fold up outer 1 to 1 1/4 inches over fruit, leaving 1/4-inch area of dough just inside of fold free of fruit. Repeat around circumference of tart, overlapping dough every 2 to 3 inches; gently pinch pleat dough to secure, but do not press dough into fruit. Transfer parchment with tart to rimmed baking sheet. Repeat with remaining fruit and dough. Brush the dough with water and sprinkle each tartlet with remaining 1/2 tablespoon sugar. Bake until deep golden brown and fruit is bubbling, 40 to 45 minutes. Cool tartlets on wire rack 10 minutes. Using a wide metal spatula, loosen tartlets from parchment and transfer to a wire rack and cool until warm for about 20 minutes, or to room temperature.
- The amount of water that the dough will require depends on the humidity; in a dry environment, it may need more water, in a humid environment, less. The dough can be made ahead and refrigerated overnight or tightly wrapped in two sheets of plastic wrap and frozen for up to one week. If at any point the dough becomes soft, sticky, and difficult to work with during rolling, chill it until it becomes workable.
Pasta with Cauliflower, Bacon, and Bread Crumbs for Two


It’s 19 degrees outside right now with snow covering everything, but inside it’s toasty warm and smells like bacon and herbs. Smelling fresh herbs in the winter makes me happy! Smelling bacon ALWAYS makes me happy! 🙂

Easy weeknight meals also makes me happy but I also don’t want to sacrifice flavor for ease. This recipe delivers on both. Pasta, nutty cauliflower, meaty bacon and crispy bread crumbs are a wonderful combination and the flavors are so well balanced. The lemon juice at the end really helps to brighten it all up. Browning cauliflower in a skillet develops its flavors and cooks off some of the water to keep it from becoming mushy.

Cooking the pasta in a small amount of water skips the draining step and makes a creamy sauce as the pasta cooks. Topping the pasta with bacon-flavored bread crumbs adds texture and another layer of flavor.


- 2 slices bacon cut into 1/4-inch pieces
- 1/4 cup panko bread crumbs
- 2 tsp vegetable oil
- 1/2 head cauliflower, cored and cut into 1-inch florets
- 1 onion chopped fine
- 1/2 teaspoon minced fresh thyme
- 1/2 pound ziti rigati (or any ridged pasta)
- 2 3/4 cup chicken broth
- 1/4 cup dry white wine
- 2 tablespoons minced fresh parsley
- 1/2 teaspoon lemon juice
- Cook bacon in a skillet until crisp, about 5 to 7 minutes.
- Add panko and 1/4 tsp pepper and stir until browned and well coated, 2 to 4 minutes. Transfer to a bowl and wipe out skillet.
- Add 2 tsp. oil into empty skillet and heat until shimmering, add the cauliflower and 1/2 tsp salt and cook until browned in spots and crisp-tender, 7-10 minutes. Remove pan from heat and cover and keep warm.
- Heat 1 tsp of oil in large saucepan over medium heat until shimmering. Add onion, thyme, and 1/4 teaspoon salt; cook, stirring frequently, until onion has softened, 3 to 5 minutes.
- Increase heat to high, add pasta, broth, and wine, and bring to simmer. Cook pasta, stirring often, until most of liquid is absorbed and pasta is al dente, about 10 minutes.
- Remove pan from heat; stir in parsley, lemon juice, and cauliflower. Taste to see if additional salt and pepper is needed and serve, passing the bacon-breadcrumb mixture.
- If the pasta seems dry add 2 tbsp of hot water.
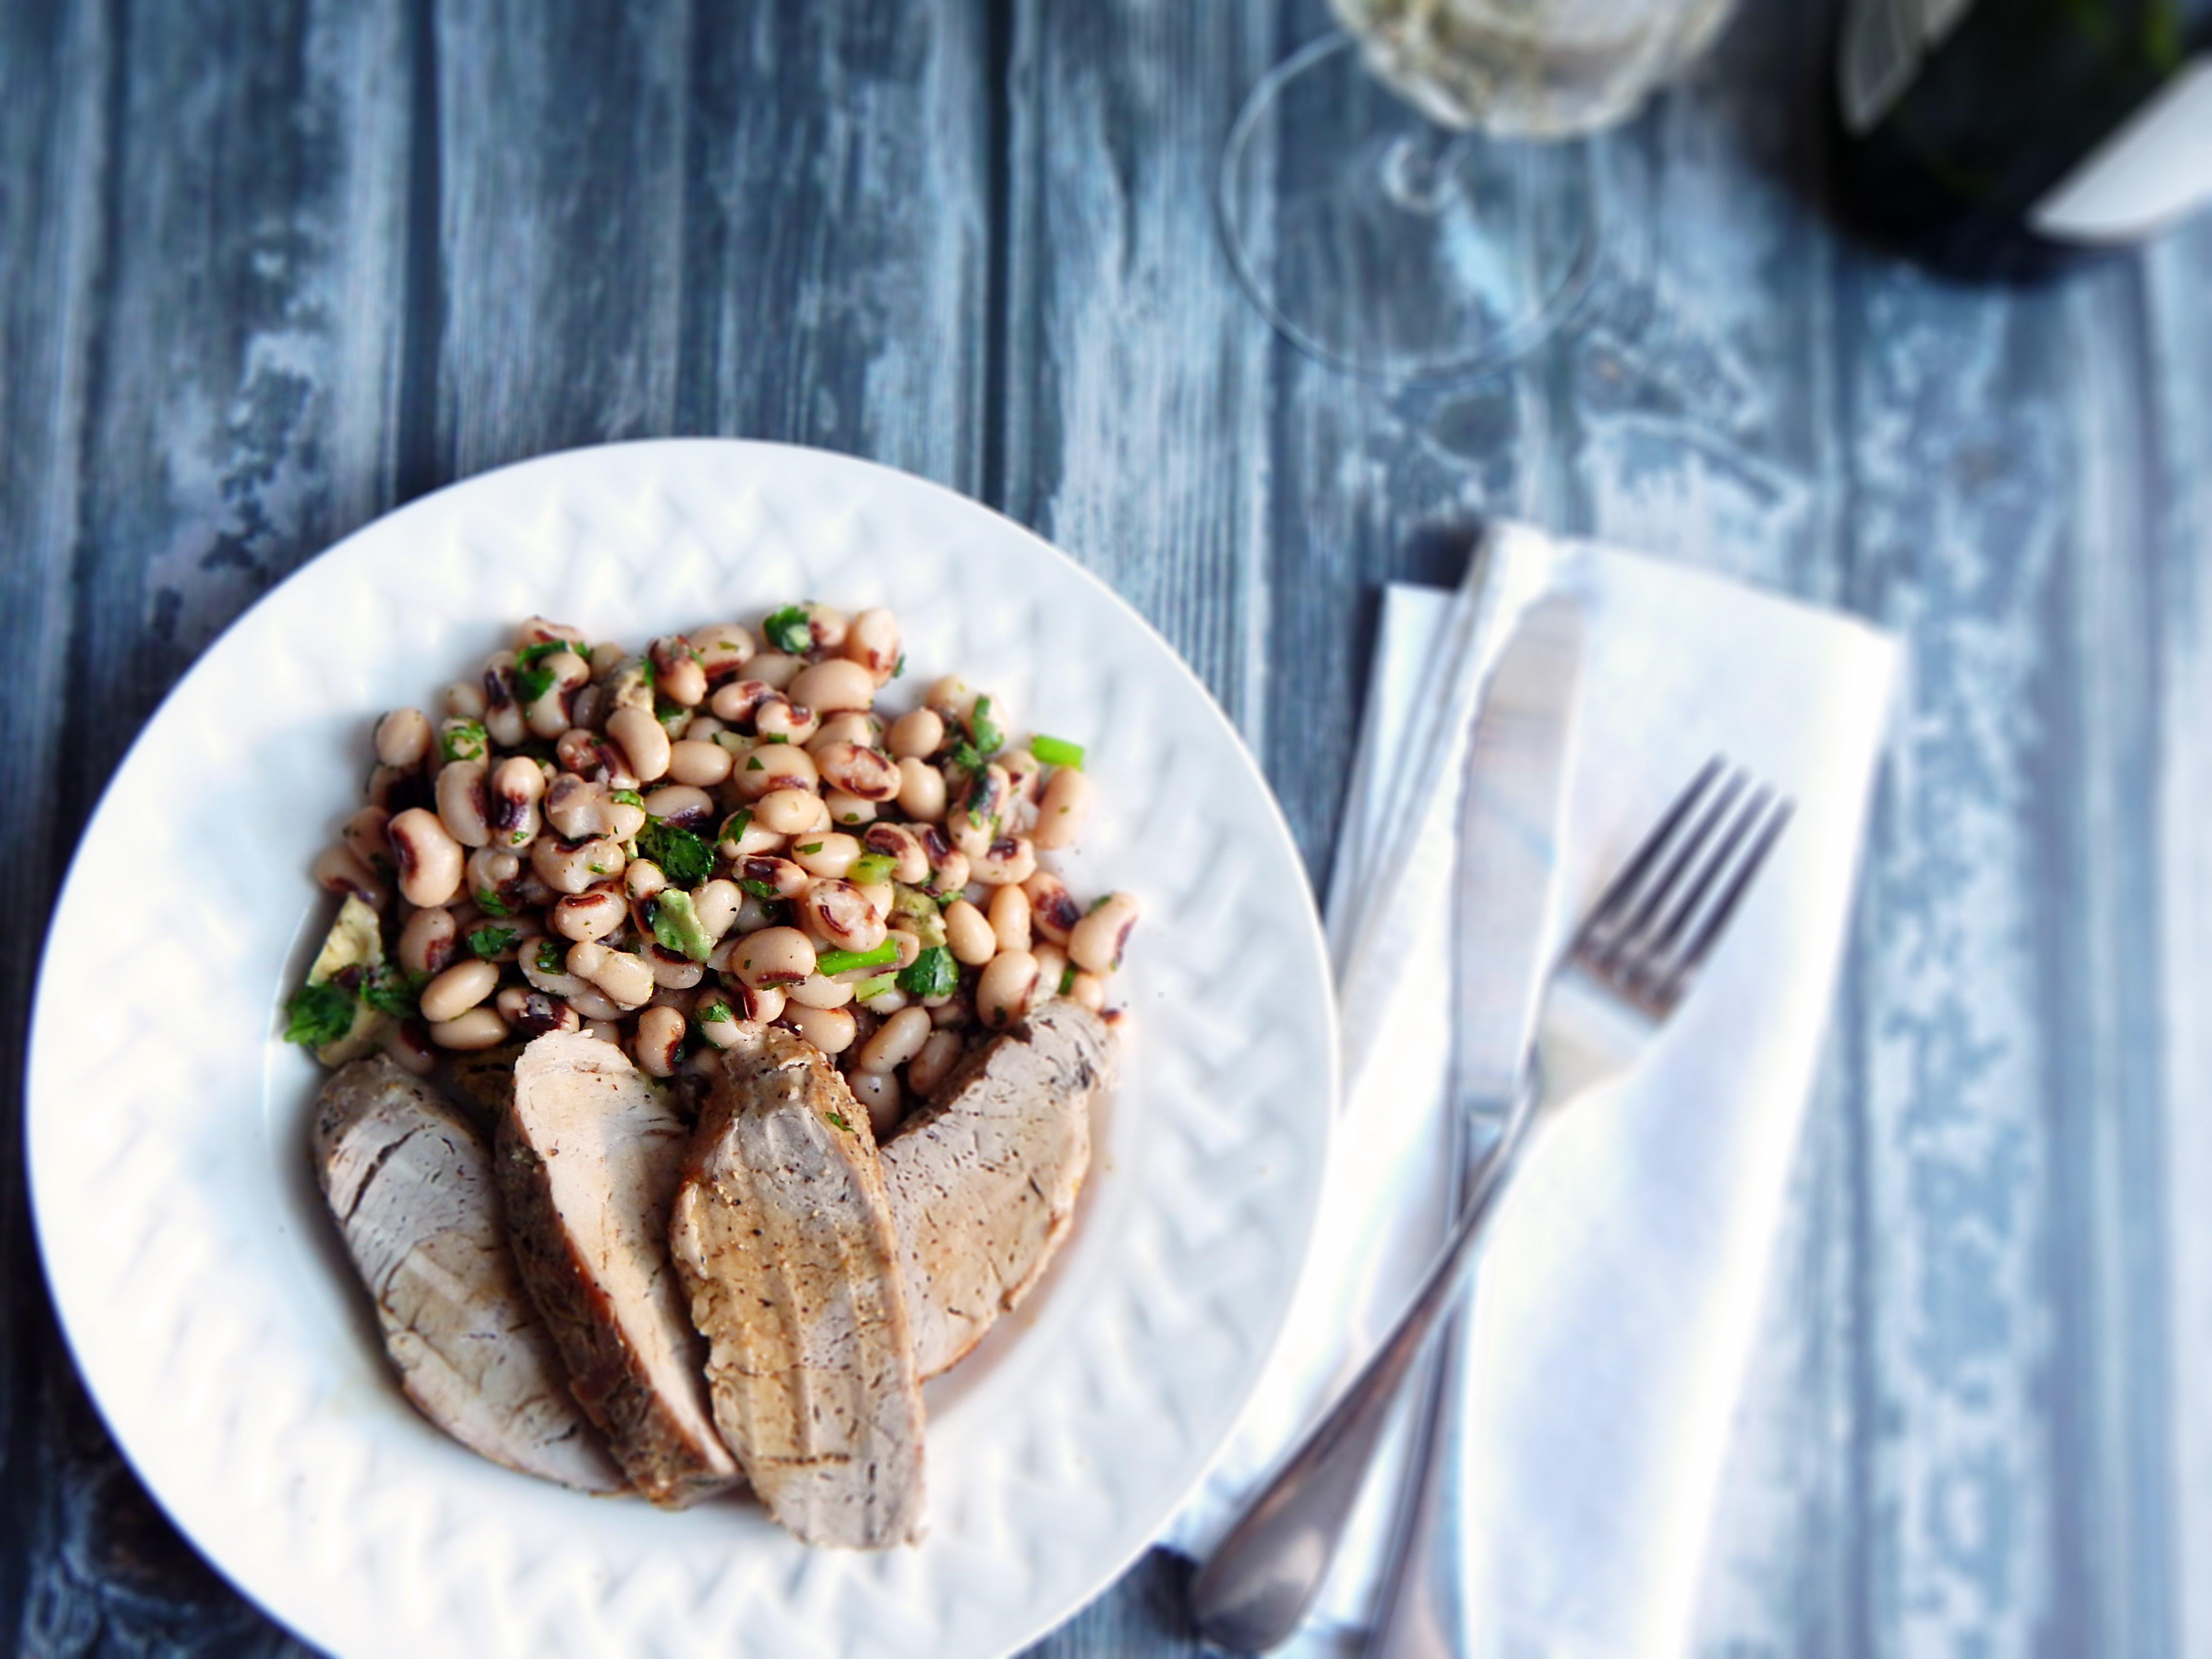
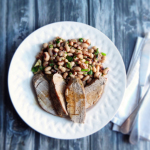
Quick and Easy Broiled Pork Tenderloin and Black-Eyed Pea Salad for Two
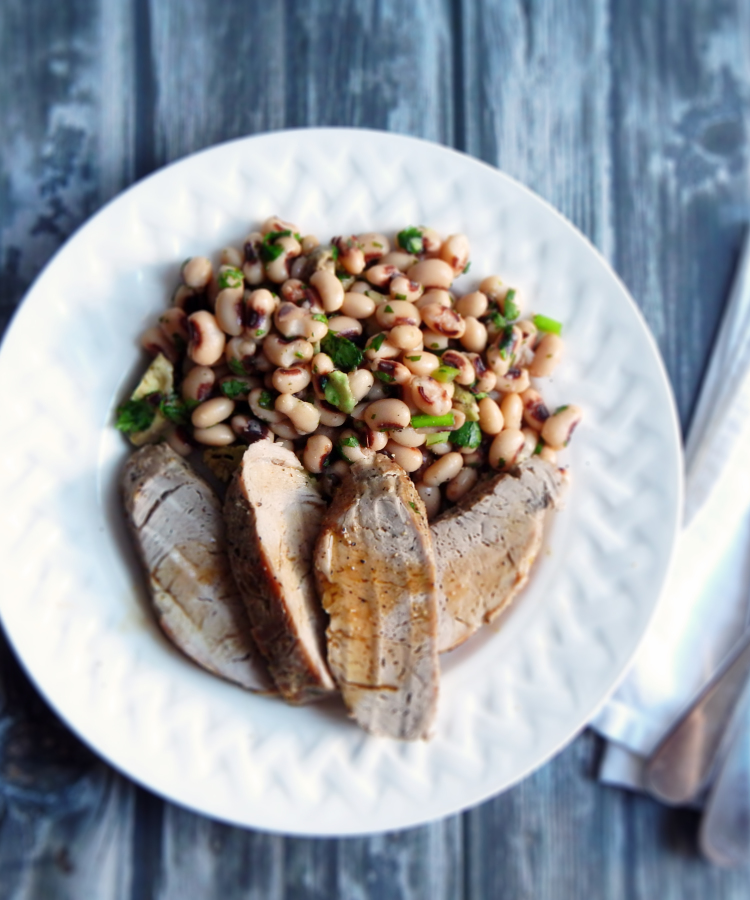

I love fast, easy meals during the week. This recipe is healthy, low in fat, diabetic friendly, and you can have it on the table in 20 minutes! I think the broiler is so under utilized. I don’t know why I don’t use it more often, it’s so quick! Toss the pork in the oven and in 10 minutes it’s done! I also love the black-eyed pea salad and could just make a meal off of that alone! I love how it doesn’t have any oil in the dressing, just fresh lime juice. I have used bottled lime juice when I didn’t have any limes and it was great! I have also substituted cilantro for the parsley when I had too much cilantro in the fridge.
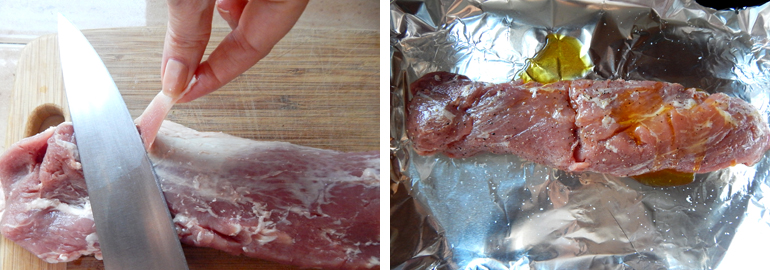
The first thing you’ll want to do is to set your oven to broil and raise the rack in your oven to the top. Next you’ll remove the silver skin on the pork loin, it’s tough and can cause the pork to curl if it’s not removed. Remove any fat as well. Rub a teaspoon of oil on the meat and then season with salt and pepper. I like to line the pan with foil for easy clean up. Place the pork loin in the oven and set a timer for 5 minutes to check it and turn it if it’s brown. You’ll want to turn the pork once for even cooking.
 While the pork is cooking go ahead and rinse your peas really well. Place the rinsed and drained peas in a bowl and add 1/2 of a diced avocado, 1 scallion, and 2 tablespoons of chopped parsley and fresh lime juice.

Check the pork if you haven’t already and flip it for another 5 minutes. Insert an instant read thermometer. You’ll want a temperature between 140-145 degrees. Let the meat rest for 10 min. Slice against the grain and drizzle the pork with any pan juices. Enjoy!

- 1 can (15 ounces) black-eyed peas (preferably no salt added), drained and rinsed well
- 1/2 avocado, halved, pitted, peeled, and diced medium
- 1 scallion, thinly sliced
- 2 tablespoons chopped fresh parsley
- 1 tablespoons fresh lime juice
- Coarse salt and ground pepper
- 12 ounces pork tenderloin, excess fat and silver skin removed
- 1 teaspoon olive oil
- Heat broiler, with rack in top position. In a medium bowl, combine black-eyed peas, avocado, scallions, parsley, and lime juice. Season with salt and pepper and mix well.
- Rub pork with oil and season with salt and pepper. Place on a rimmed baking sheet lined with foil. Cook 10 to 12 minutes for medium, turning frequently (an instant-read thermometer should read 145 when inserted in center of pork). Let rest 10 minutes. Thinly slice pork and serve with salad and any cooking juices from sheet.
- You can double the salad easily if you want left-overs to take to lunch the next day. I also know the pork sizing seems a bit off for two people but I can never find a pork loin much smaller than 12 ounces.
Easy Beef Stew for Two

It’s cold out today! When it’s cold out I immediately think of warm, comforting food and this super easy full-bodied stew is perfect for cold days! This red wine-braised beef stew is the ultimate one-pot meal, loaded with tender potatoes and carrots. Don’t forget a loaf of crusty French bread for sopping up the rich sauce.

Many stew recipes call for cooking the meat and vegetables at the same time, leaving the vegetables overcooked and mushy. Instead, first braise the meat with onions in red wine and beef broth until a rich sauce develops. Then, after about an hour, add carrots, and potatoes. By the time the vegetables are cooked, the beef will be tender, then just stir in some peas if you like, for a little freshness and color. I sprinkle a little fresh parsley in at the end. You can also spoon the stew over buttered egg noodles. YUMMY!


- 1 pound beef stew meat or boneless beef short ribs, trimmed and cut into 1 1/2-inch pieces
- Salt and pepper
- 1 tablespoon vegetable oil
- 1 small onion, chopped fine
- 2 garlic cloves, minced
- 1 teaspoon tomato paste (freeze leftover tomato paste in a ziploc bag)
- 1/2 teaspoon minced fresh thyme or 1/8 teaspoon dried
- 1 tablespoon all-purpose flour
- 1/4 cup dry red wine
- 1 1/2 cups beef broth
- 1 bay leaf
- 1 Yukon Gold potato (8 ounces), cut into 3/4-inch pieces
- 2 carrots, peeled and sliced 3/4 inch thick
- 1/4 cup frozen peas
- 1 tablespoon minced fresh parsley
- Adjust oven rack to middle position and heat oven to 300 degrees. Pat beef dry with paper towels and season with salt and pepper. Heat oil in medium ovensafe saucepan over medium-high heat until just smoking. Brown beef on all sides, about 8 minutes; transfer to bowl.
- Add onion to fat left in saucepan and cook over medium heat until softened, about 5 minutes. Stir in garlic, tomato paste, and thyme and cook until fragrant, about 30 seconds. Stir in flour and cook for 1 minute.
- Slowly whisk in wine, scraping up any browned bits and smoothing out any lumps. Stir in broth, bay leaf, and browned beef with any accumulated juices and bring to simmer. Cover, transfer saucepan to oven, and cook for 1 hour.
- Stir in potato and carrots and continue to cook in oven, covered, until beef and vegetables are tender, 2 hours or until vegetables are tender.
- Discard bay leaf. Using large spoon, skim excess fat from surface of stew, if needed.
- Stir in peas and let sit until heated through, about 2 minutes. Stir in parsley and season with salt and pepper to taste. Eat up!
- Serve with crusty bread or over buttered egg noodles.


